Ultra-macro Photography Explained
In the past, we’ve produced several videos related to macro filmmaking and photography. However, we’ve never found a way to take extreme macro photographs of insect eyes, legs or hair. After visiting Jiri Hulcr at the Forest Entomology Lab, we now have insight into this mind-blowing technique and have broken it down into 5 simple steps.
The 5 Steps to Taking Ultra-Macro Photos
This technique outlines how Jiri and his team take some of the world’s highest resolution and detailed macro photographs. While they wouldn’t claim they’re the best at it, I think the basics of the process are all there for any artist or scientist to take some of the most amazing insect and macro photographs you’ve ever seen. Here are the 5 steps we detailed in the above video.
Step 1: Have the Proper Setup
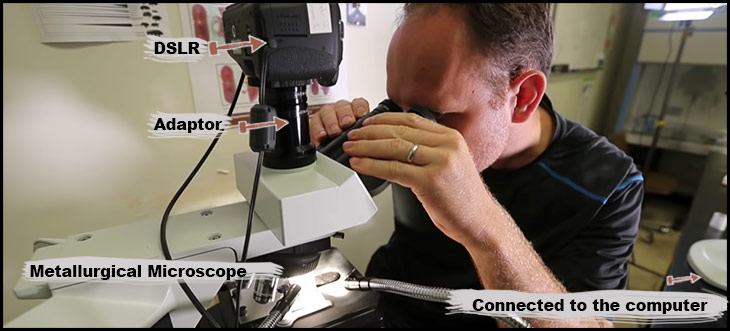
Jiri and Andrew use a few microscopes to take their photos. The most powerful one is the above metallurgical microscope that has a DSLR and DSLR adaptor connected to the computer to allow them to take photographs of the insects. This microscope allows them the have a bit larger distance between the insect and the objectives. This isn’t possible with traditional microscopes.
The next big step is having a solid table that won’t shake. They have a marble slab on a heavy wooden desk with rubber legs to prevent shake.
Step 2: Prepping the Specimen
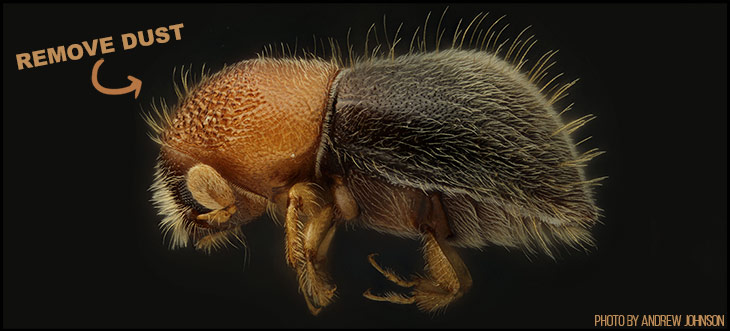
Jiri told me that he thinks this is the biggest and most important step. Small flecks of dust, as he explains, can completely ruin the image of a specimen. Andrew even told me that at times he’ll spend upwards of half and hour prepping each insect. This is done either by dabbing each one off with a paper soaked in ethanol or by carefully adding some white elmer’s glue and then pulling it off once it’s slightly dry.
Step 3: Lights and Diffusion
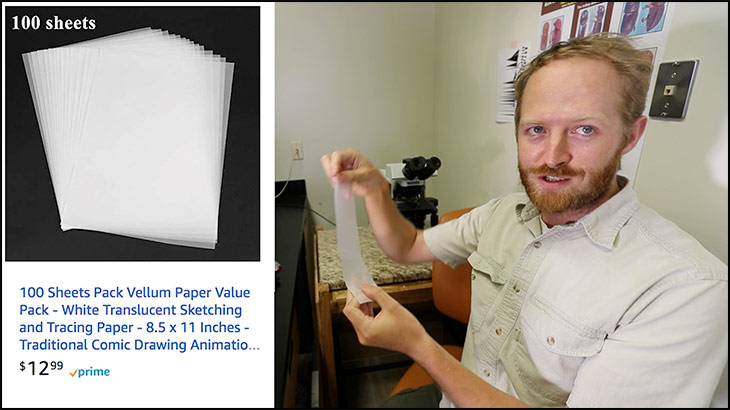
The next big ingredient is making sure the light comes in as diffuse as possible. They do this by adding Vellum around the subject. This is the material you’d buy as tracing paper or to make wedding invitations with. Sometimes they’ll add two circular rings of this diffusion material to make the light spread out as much as possible.
Step 4: Take the Photos
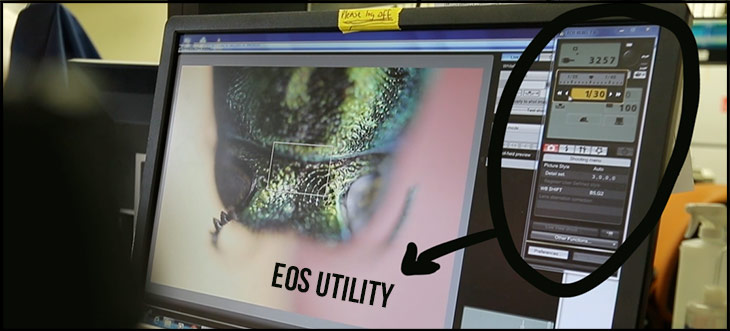
Believe it or not, but this is the simplest step. It doesn’t matter how you take the photos. They use canon’s built in EOS Utility on the computer to snap the photos. The real key is to snap a photo, move the focus slightly and snap another. For small insects of around 1mm they may take about 70 photos and then proceed to stack them together.
Step 5: Stack the Macro Shots
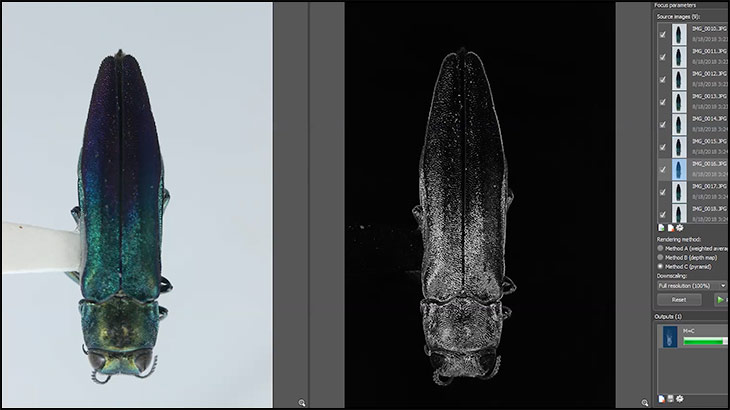
The stacking process is also pretty simple. You can purchase Helicon Focus (about 30 USD), drop the photos in, and click a single button to let it stack them together. In less than a minute you’ll have a completely stacked image, ready to play with!
Learning More Macro?
If you’re interested in doing macro with larger insects, I recommend watching this video we made earlier in the year where we teamed up with Phil Torres and then took a 100mm macro lens into the jungles of Panama. It shows the capabilities of a field setup and how you might go about constructing it yourself.
- If you found any of this useful, might we note that it’s all made possible by small donations from our amazing patrons. See more about what we’re doing for science education and SciComm here.


