How to make 360-Degree Videos: A Guide to Creating, Shooting, Editing, and Uploading
From our perspective, VR (virtual reality) is the next unrefined technology with the potential to change the world. Here is a quick 2 minute sample video we shot to demonstrate.
So what is VR? In simple terms, it’s the act of using a combination of computing power and optics to simulate a visual and auditory experience that seeks to fool the user into believing they’re someplace else.
But most people have never experienced VR. Those that think they have may have put on a Google Cardboard headset and called it VR. By our definition, it qualifies, but it’s very basic. It doesn’t offer the user the amazing potential of virtual reality and frankly, could put off potential adopters who experience nausea after a minute or two.
We’re convinced that this new technology is a game changer. The world of VR is ever-changing, and 2016 is set to be the year of VR. If you want to get a grasp on how to start watching VR content, then I suggest this great “Basic Guide to Virtual Reality in 2016.” If you’re ready to produce content, then check out our basics video right here.
Producer’s Guide to 360° Videos
This article is intended for creators who are seeking to produce content. We spent the last week trying to figure it out, and we’re here to tell you that it’s completely doable in this day and age by the average production company. It does significantly increase the workflow and cost of a production, but it’s not an impossible task. Here is what we’ll cover to give you a basic understanding of the medium:
360 degree/VR Cameras and Rigs
The first thing you’re going to have to do is get a rig that will allow you to shoot in 360 degrees.
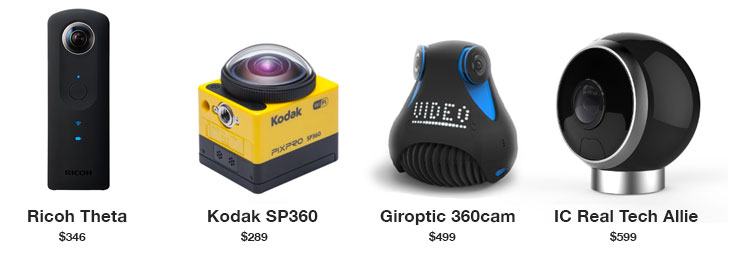
Stand-Alone Cameras
There are a handful of cameras out there that shoot 360-degree video in a single device. These include the Ricoh Theta, Kodak SP360, Giroptic 360cam, and IC Real Tech Allie. The prices for these range from 289 to 600 USD. The footage coming from them isn’t going to be the same quality as a series of 15 GoPro cameras, but it’s not bad for such a low price point.
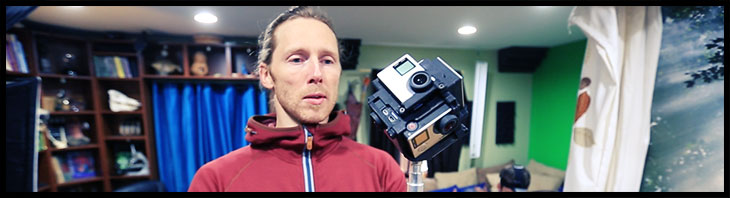
Rigs for GoPros
The best entry-level technique we’ve found to shoot 360-degree video that could be streamed in VR with amazing results is taking a minimum of 5 or 6 GoPros and mounting them together in a molded rig such as the 360Hero cases or the Freedom360 rigs. No matter what you do, the minimum investment here is close to 3050 USD (6 GoPros + 500 360Hero Rig as seen below).
360-degree/VR Editing Programs
The easiest program — and probably most used today — is AutoPano Video Pro (750 USD). This program comes with the stitching, syncing, and stabilization software you need to make 360-degree videos. This is the basic software you’ll need to make a single clip from your multiple cameras. However, if you’re going to add text to it, or edit up multiple pieces into a longer video, you’ll need to bring them into an editing program.
Adding Text and Graphics Using AE
To add text and graphics, the easiest method we’ve found is to download the 100 USD plugin – Skybox by Mettle. You’ll also need to have AE Creative Cloud to make this work. With this plugin, you’ll be able to add text, graphics, and get really creative. Here is a quick tutorial showing the basic process.
Editing 360° Video in FCPX
If you’re editing video in FCPX, you can edit the exported .mp4 videos that you get from AutoPano Video Pro into a sequence. The videos will have this odd look to them…
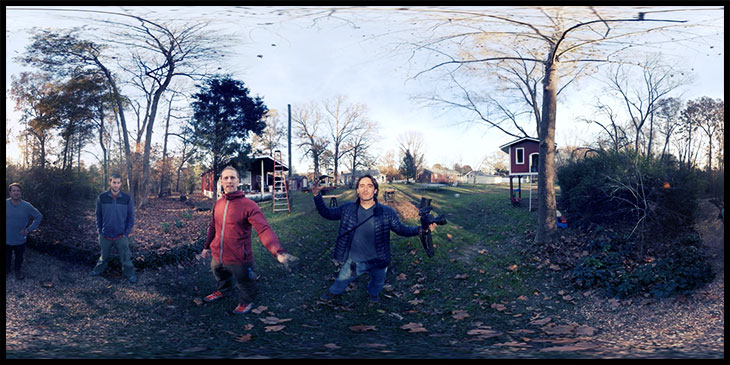
Essentially this is a 360-degree view of the world, whereby the top and bottom are stretched out. We’re all accustomed to looking at footage like this, though, if you consider how a map of the Earth looks with the poles stretched out in a similar way.
Just edit this stretched video into a sequence and then export as an mp4 file (export as h264 – then change the extension to .mp4).
Editing 360° Video in Premiere
The process works exactly the same as in FCPX. You can edit the footage in this stretched form. One nice feature in Premiere, is the ability to edit with an Oculus Rift headset on. If you’re prone to motion sickness, you may not want to edit long hours like this, but it’s a nice way to have a “director’s” view of what the end product will look like.
Uploading 360° Content to YouTube
To upload videos to YouTube, you have to follow their simple 360 video workflow. To make it simple, I outlined the process below. Essentially you have to download a small app and drop your video into it. This process changes some of the metadata, allowing YouTube to properly read the file as what it is: 360-degree video.
START by:
- Downloading the 360 Video Metadata app for Mac or Windows
- Un-zip the file, then open the 360 Video Metadata app. If you’re on a Mac, you may need to right-click the app and then click “Open”
- Select your video file
- Select the checkbox for “Spherical” and click “Save as”. Note: Do not select the 3D Top-bottom checkbox. For more information, refer to upload instructions for virtual reality videos.
- Enter a name for the file that will be created
- Save the file. A new file will be created automatically in the same location as the original file
- Upload the new file to YouTube
- Wait for the 360 degree effect to process. This may take up to an hour.
Watching 360° video with a VR headset
Now that you’ve finished your video, you’ll want to watch and share it with friends and clients. Here are some basic options.
Share It On YouTube
If you send a client video via YouTube, it’s likely all they’ll be able to do is scroll around it with a mouse (if seen from their computer) or wave their phone around to see the world you took video of. The second is my preferred method of sharing with clients. However, to get high-res video, you’re having to stream a 4K image. Most of the time the quality looks terrible. It’s a nice sneak peak, but most of the time this isn’t ideal.
If you have an android phone, you can take this one step further and watch it on YouTube via Google Cardboard.
Share it via Littlstar
Littlstar is an app you can download on your phone and play VR videos in much the same way as on YouTube. I’ve found the quality is a tad better (not much though) and it works with Google Cardboard on the iPhone. That’s a plus. However, it’s still not a great VR experience unless you’re using it with a dedicated VR headset like the GearVR or Oculus Rift (see below).
Use the GearVR with Samsung Phones
GearVR by Samsung is a 100 USD unit that allows Samsung phones to play VR content. It is a decent first VR experience for people. You can watch videos via Littlstar or any number of big providers. Hulu and Netflix are beginning to host VR content this year. It should be a game changer.
Using the New Oculus Headset
The best experience for your clients will be using a dedicated headset and computer system to share the high res (4K-6K) VR videos you produce in 60 fps. This is what the yet-to-be-released Oculus Rift aims to deliver. However, you’re going to need a dedicated Oculus-ready gaming machine to run it (another 1000 USD). Currently Apple doesn’t even produce a product with fast enough specs, so you’ll have to go the PC route.
Uses of 360° Video
It has been a long time since I’ve been this excited about a new way of making and sharing films. 360-degree video is something new and exciting. Before the novelty wears off, use it to attract viewers and get extra clicks from people amazed at the technology. Then experiment with it. Try new and different ways for marketing yourself or your products that not many other people are doing right this minute.
Other Resources for 360° Content Creators
- Complete Guide to VR (so far)
- Dryft Digital – My friends doing VR Natural History Filmmaking
- Littlstar – An App to view VR content like ours on your phone


