Animation for Science Docs
Science and natural history films are designed to explain natural phenomena on Earth. Recently these documentaries have started to include more animations to tell a story quickly and graphically, in ways that standard footage can’t.
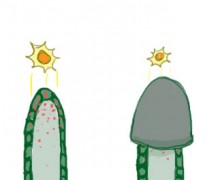
Animations can also be used to add humor to an otherwise heavy topic. Take An Inconvenient Truth, for example. It used a Simpsons-esque animation to explain how the sun’s rays work in relation to our atmosphere and greenhouse gases.
We feel strongly that animations are a great tool for the science filmmaker and something that everyone should learn. You don’t have to be a master; there are several simple techniques/programs that you can use to start. We’ll highlight the ones we have had the most success with and that seem to be the most commonly used.
The Basics
The first thing to learn is a basic photo-imaging tool, such as Photoshop. Knowing this program will allow you to change aspects of your video in post-production. You may want to change the name on a sign, animate a still image, or show a simple graph. It’s the most basic tool and the building block for complex animations.
The second basic editing tool is a motion-graphics package. Most editors we work with use Adobe After Effects. It is the workhorse for most motion graphics and will likely remain that way for some time to come. You can manipulate images in 2D or 3D. But if you’re going to start doing a lot of 3D animating, you may want to consider some of the other programs we suggest in that field.
Stop-Motion Animation
One of the simplest way to create an animation is by taking photographs in a sequence, a process called stop-motion. Often we’ll get approached by filmmakers who have never done any form of animation but want to use it to explain a concept. This may involve setting a camera toward a white board and snapping photos as you draw, or setting up clay figures like Wallace and Gromit.
Fortunately, you can actually get programs that help with the process. They allow you to see how the animation will look as you’re building the sequence.
One of the best programs for the amateur stop-motion artist is iStopMotion by Boinx. It allows you to preview the animation as you create it. It also allows you to do onion-skinning, a technique that shows you the previous frames screened over the frame you’re about to capture. It makes the entire process much easier.
Claymation
Claymation is an extension of stop-animation. It can be extremely tricky to do, but a basic claymation is possible with only a bit of practice. In the past, animators had to calculate the amount of time an animation should last and quickly do the math to get it right. Now there are programs available that let you see the action of the animation as it is being produced.
2D Animation
Most of Disney’s animations are done by traditional 2D animation techniques, where each plate is painstakingly drawn by the animators. Today, computers allow animators to speed up the process with digital format. The computer can create the in-between motion when we want a graphic to move across the frame. Flash and After Effects are the main programs that achieve this.
Flash Animation
Adobe Flash is a perfect tool for animators working on the web, but it’s also ideal for broadcast production. Flash allows the user to create movies within movies. For instance, we could create a Flash clip of waves going up and down to place behind a fish we want to animate.
Adobe After Effects
Adobe After Effects (AE) is the mainstay for animators and editors in the industry. Often, a Flash animation will be exported then composited in AE. Graphics and text can be given motion, and objects can be tracked to a specific reference point. For instance, one thing we’ve done in a few of our series is have the host hold out their finger. We then animate a spinning Earth on top of it. The hosts can then talk about the mini-Earth while explaining the science. Few other programs can do this as easily as AE.
3D Animation
Many 2D animations attempt to give the reality of a 3D world. When we talk about 3D animation, we usually refer to animations that were created by moving a camera around a three-dimensional object to give a perfect representation of the model. For certain applications, rendering something in a 3D world saves a lot of time.
Let’s say we want to animate a molecule of water by having the molecule spin. Animating this in a 2D space would require us to create images for every frame of the spin then cycle those images together to create the illusion of a 3D environment. With a 3D editing program, we simply model three spheres into the shape of a water molecule, and tell the molecules to spin for any length of time we desire. The computer renders the in-between images perfectly. There are several programs on the market for 3D animation, including Blender, Maya, Lightwave, 3d Max, Vue, and Google Sketchup.
Blender
Blender is an open source 3D content creation suite that is available for most operating systems. The best thing about Blender is that it’s free. If you’re new to 3D animation, this program allows you to hop in and try it without the expense.
Maya
Maya is by far the gorilla of 3D animation software. It is the program of choice for animators in many big production houses. Many colleges teach courses in Maya (including one that I took). There is a trial version to test it out. It’s not difficult to learn, but from experience, it might take a good month of tutorials to get to where you want to be when producing basic science animations. Most Untamed Science animators, in-house and contracted, use this program.
Vue
If you’re looking to create mostly landscapes, Vue is the program for you. It can produce photo-realistic environments very quickly. Many of Avatar’s scenes were created in Vue.
An Interview with Expert Science Animator, Keren Albala
In 2009 and 2010, Untamed Science collaborated with science animator Keren Albala. While we do many of our own animations in house, Keren is really an expert in the field of science animation. We asked her a series of questions about the topic, which we think you’ll find extremely useful.
How did you get into science animation?
I got started doing science animation while getting my animation MFA at USC. I was very lucky to be surrounded by faculty that encouraged interdisciplinary work. The natural world has always been my biggest artistic inspiration, so when an internship was created between my department and USC’s Wrigley Institute for Environmental Studies I jumped at the chance to apply. It was an amazing experience; I learned so much about both animation and science, and I’ve continued seeking out opportunities to combine the two.
What programs do you use?
As for what I use to make things, I employ a wide range of 2D and 3D animation software, and often photo-, sound-, and video-editing software. I choose whatever is best suited for each project; sometimes it’s plain old ink and paper.
What advice do you have for those trying to get into science animation work?
My advice for those trying to get into science animation work would be to tap into the local resources available to you. There are many schools now that have science tracks within their animation, visual effects, film, or illustration departments, or that would allow students to collaborate with scientists in other departments. Make friends with folks doing interesting research and see if there are ways for you to participate. There are also many guilds, meet-ups, and online collectives for scientific artists, as well as classes being taught at local colleges and museums. Just ask my best friend, the Internet!
What advice do you have for filmmakers looking for science animators?
If you are looking for science animators, my advice would be similar. Check with schools and museums, and there are now quite a few commercial studios specializing in scientific and educational animation. Again, the Internet is a terrific resource.
Learn more about Keren’s work or inquire about working with her at kerenalbala.com.











































I just love the way you present this information to us, its a great knowledgeable website about animation, science doc thanks for sharing this amazing information and advice
Thanks for the comment Emma! It’s great to hear from you. we’re trying hard to make it work here as well. – Rob