How to Take 360° Photos and Edit in Photoshop
Every week I put out a simple video about how to improve your photo and video skills. It just dawned on me that I should at least introduce everyone to one of the simplest things I do when I travel – creating 360 degree photos to share later. So, on this page, I’ll link in the full explanatory video as well as the 360 degree videos we made from it – see those at the bottom. Then, I’ll add links to the Momento360 pages that give full explanations about how to embed them on any website you have, be it wordpress, squarespace, wix, or any basic html.
Step 1: Download the Apps
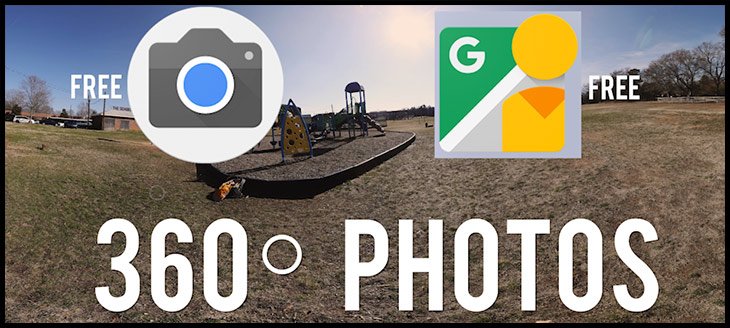
On android phones like the google Pixel, there is nothing you need to do. Simply choose the spherical panorama option from the drop-down box in the photo app and start clicking away. If you’re using an apple device, then you can download google street view which allows you to take 360 degree photos.
Step 2: Take the Panoramas
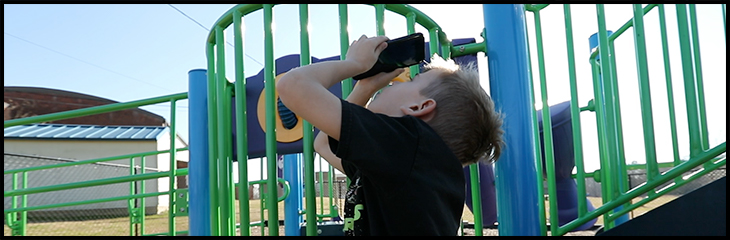
This is a really simple process. The apps walk you through where to position the phone. Just try as much as possible to rotate around a fixed point. The more you can do that, the better your 360 photos will be.
Step 3: Download and Photoshop
When you finish the images they’ll import as a flat portrait – much like a flattened map of the world. It might look like this:
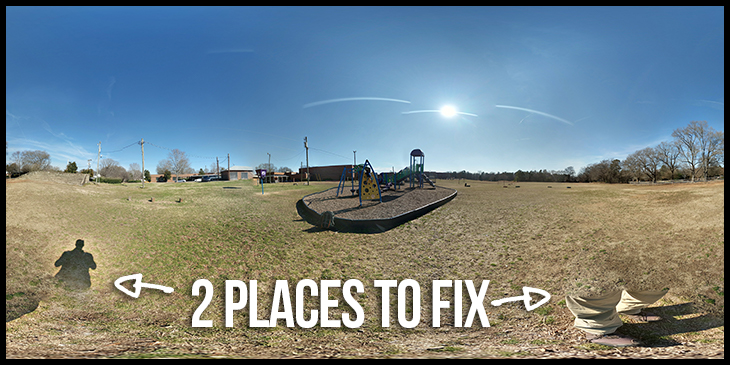
Notice that there are some small imperfections. The feet and the shadow can be fixed in Photoshop. The easiest way to do that is in the new Photoshop CC 2018 update whereby you can convert these flat images into spherical panoramas via this menu click:
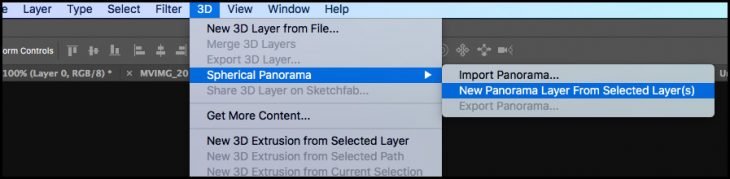
Now, it’s just a matter of fixing like you would normally in photoshop. Not all tools are active in this mode, but you can heal or content-aware fill the areas as needed (per the video tutorial above).
Export and upload to a Sharing Platform
The next step is to choose 3D>Spherical Panorama>Export Panorama to flatten the image and allow it to be uploaded to your chosen destination. You can easily share it on FB or Twitter in this format. However, if you want to embed it on your website, I found Momento360.com to be a great platform. Since we have a wordpress site, there is a plugin written that allows these 360 images to resize with your phone or tablet. That’s a handy feature. For full details on how to embed a 360 image on your chosen website go here.
Here are some of the final embedded videos from this shoot.
School 360 via Google Pixel
[momentopress url=https://momento360.com/e/u/4e4dd6832c5c4892beaa03b4481c4c99?utm_campaign=embed&utm_source=other&utm_medium=other]
School 360 via snapshots from my DSLR (fully manual)
[momentopress url=https://momento360.com/e/u/da81ebfb1fc540298bed85d1bb65ab44?utm_campaign=embed&utm_source=other&utm_medium=other]
Here are a few other places I’ve been that I thought were worthy of a 360 degree image.
Timna Valley – Israel
[momentopress url=https://momento360.com/e/u/0108ee6f7b5e4078b27ddbaa6bb40fea?utm_campaign=embed&utm_source=other&utm_medium=other]
This is the location that we found two tombs and helped with the excavation of 3 (possibly 4) bodies dating back to the time of King Solomon. I marked the location of our tomb digs on the 360 map. I also marked where I lost the drone. It’s up in those cliffs somewhere. Never found it.
Northern Lights – Abisko Station, Sweden
[momentopress url=https://momento360.com/e/u/4e0e9856d21b4534b1d4164815ae5dc8?utm_campaign=embed&utm_source=other&utm_medium=other]
This is the best place in Sweden to see the northern lights. We did a video on that here. This was the starting place and our resting place. We’d wander down into the flats to take photos at night.
Magnetic Island, Australia
[momentopress url=https://momento360.com/e/u/920f9d6f4a664cdd8135b5ed06a69f27?utm_campaign=embed&utm_source=other&utm_medium=other]
We spent a week on this tropical island paradise to film the bugs in people’s homes and do a few features about death adders!
Backyard Neat
[momentopress url=https://momento360.com/e/u/f332c8e28eb74226aadb16c371cf448d?utm_campaign=embed&utm_source=other&utm_medium=other]
360 Images with the DRONE!
The process of making these is very similar. However, you first have to stitch the images in photoshop together using File>Automate>Photomerge>Spherical. I explain the whole thing in this video.
And here is the final image!
[momentopress url=https://momento360.com/e/u/86211d1cbba243cfb7f4a3fbd94b27b9?utm_campaign=embed&utm_source=other&utm_medium=other]


